Sunday, July 29, 2012

Father Guido Pancetta


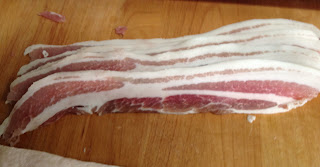
I’ve put up a couple posts on makin’ bacon and now I want to take a moment out of our normally scheduled programming to talk about bacon’s lesser known but equally (if not more) flavorful cousin, Father Guido Pancetta (FGP for short).  As far as meat is concerned it’s the same cut as bacon, pork belly and in this case I used a nice half Duroc belly from our friends over at Salmon Creek Farms.  Similar to bacon this belly was also cured but instead of the basic cure I used with my bacon (The Baconing Part I) brown sugar is substituted for the white sugar and the ratio is adjusted.  At this point we’re taking the proverbial left turn at Albuquerque and it’s the last time you’ll see much resemblance between bacon and pancetta (aka FGP).  
I adapted this recipe from Polcyn and Ruhlman’s book,Charcuterie, which is a great resource to start your journey into charcuterie.  
Father Guido Pancetta 


2.25 kilogram pork belly (skinless) - my belly was closer to 2.07 kg
4 garlic cloves, thinly sliced
12 g pink salt (available from Butcher & Packer)
50 g light brown sugar
40 g black peppercorns (divided use)
20 g coriander seeds
10 g juniper berries
4 bay leaves, crumbled
4 g freshly grated nutmeg
4 sprigs fresh thyme (I left mine mostly whole)  

Rinse the belly and pat dry.  Keep the belly refrigerated until ready to use.  In a small pan toast the juniper berries, coriander seeds and half the peppercorns for a couple minutes, this will help make everything more flavorful. 


 In order for those flavors to get into the belly you need to break up the spices.  You can use a mortar and pestle like I did, a spice grinder (don’t use your coffee grinder or your next batch of coffee will taste nasty, trust me on this one), crush with the bottom of a frying pan or the side of a chefs knife.  Don’t worry about consistency in size, just get everything cracked.  You wan't to just break everything up, not pulverize it.  


Mix your ground spices with everything else and combine well.
  

Get your belly out of the refrigerator and rub your salt/spice mix all over the belly, use it all.  Pretend you're Swedish and your massaging the belly, make it all happy happy and don’t forget the sides.  Any excess cure mix can be sprinkled on the bottom of the dish you plan on curing the belly in and the rest on top.  Start the belly with the skin side down as the cure mix has a difficult time moving through the fat.  

Cover your belly and toss it back in the fridge.  Alternatively if you’re using a smaller piece of belly you can vacuum seal it or put it in a really large zip-top bag.  I used a hotel pan covered with plastic wrap and foil. 
Every day or every other day (your choice) pull the belly out, re-rub the belly with the spices that have fallen off and flip the belly over.


Here is what it looks like after two days curing.  Note that some liquid has been extruded but not enough to collect at the bottom of the hotel pan.


The belly was cured for seven days after which you can see the meat has reddened and shrunk a bit. 


it was rinsed well, and coated on the non-skin side with the reserved 20 g of peppercorns which were toasted and ground (a little finer than the cure mix because you're more likely to eat this pepper).


Traditionally you’d see pancetta rolled up like a pin-wheel and tied for aging but the lack of humidity in my neck of the woods would have make that a dicey proposition so I went a little off the path and wrapped the pancetta in some muslin and tossed it back in the fridge for another week.  I got this muslin at my local Jo-Ann fabric shop and got way more than I needed for less than $3...quite the bargain.  


If you weren’t aware refrigerators tend to be pretty low in humidity and the air moves around a bit when the fan/compressor kick on.  The goal was to have the muslin wick away excess moisture and have it evaporate away, concentrating the flavors of the pancetta which it did exceptionally well. 


As this is a short term cured product with no additional preservation it should be cooked prior to consumption.  One of the most common places you’ll see pancetta is in pasta carbonara (my version can be found here: Pasta Carbonara del Mar).  You can also slice it like bacon and cook it up for an awesome BLFGPs (bacon, lettuce and Father Guido Pancetta sandwich).  I also chopped a small piece into smaller pieces, sauteed it until crispy and topped some store-bought cheese raviolis with some pesto and the FGP and did a little happy dance.... 

Wednesday, July 18, 2012

Lavender

I've been thinking about some different charcuterie applications recently..more out of the box kinda of stuff like kimchee bacon and maybe an mediterranean pancetta that kinda traipzes along the line of Francais and Italia with a bit of herbs de provence mixed with some black pepper and garlic.  In talking with a friend of mine, Melissa, I learned that she had nearly the full taxonomy of lavender and brought me a sampling of English, Spanish, French and Fern Leaf lavenders and it was very interesting to smell them side by side and get a comparison.  For the most part if they'd be smelled independently of the rest I would have just labeled them lavender but the side by side comparison brought out subtleties that I likely would not have previously noticed.

The French lavender is the quintessential lavender.  When you got to your local scentery be it Yankee Candle or Bath and Bodyworks and pick up a bottle lavender scented lotion, spray or whatnot this is the lavender you're getting..your basic run o' the mill eu de toilette lavender.  Light and floral and defiantly lavender.


The English lavender had what I felt was a more floral, almost brighter, lavender scent which I actually preferred because it didn't have the must-like quality of the French version, however, I would be concerned about the amount of flower available for use as there was much less flower as compared to the French variety.


The other two were nice but I felt wouldn't be a nice for my culinary applications.  The Spanish lavender had a citrus quality to it and reminded of lemon verbena and kind straddle a the line between flower, citrus and grassy/woody herb.  My least favorite was the Fern Leaf lavender.  It was nice and all but I didn't get a whole lot of lavender scent from it and it reminded me of a pansy or nasturtium, flowery but not distinctive.  Both would be great to look at but not so much for the eatin'.


Once thing I was warned about was that the flowers become more potent as they dry so I think for experiment #2 I'm going to hang the French and English varieties to dry for a week or two and give them them another test and see if one distinguishes itself as a winner.  At that point I can look at going all in which would lead to experiment #3, flower meet meat.

Sunday, July 15, 2012

Southwestern Roasted Corn Salad; aka - Crack Salad

So this is one of favorite salads in my house.  It's original name is Crack Salad because the stuff is immediately addicting, no joke.  The recipe calls for canned corn and canned black beans but there's nothing that says you couldn't cut kernels straight off the cob and cook up your own batch of black beans.  Either way is fine.  


Very little cooking is involved and what cooking there is is actually more of a heating.  That said, you could skip the "cooking" part and still get a pretty rockin' salad.   It's vegan and if you skip the oil it'll be E2 approved.  If you really wanted to add some meat some grilled chicken would be pretty awesome.  I usually add about 2 cups of cooked quinoa to the mix to stretch it and add some protein.  If you go the quinoa route I recommend doubling the amount of spices and lime juice to compensate.  


Crack Salad


16 oz can corn, well drained
16 oz can black beans, rinsed and well drained
½ large red onion, medium dice
1 beefsteak tomato, medium dice
1 clove garlic, minced or put through garlic press
1 fat jalapeno, seeds and internal ribs removed, fine diced
juice of ½ lime
½ tsp chili powder
½ tsp cumin
½ tsp oregano
pinch red pepper flakes
2 tsp kosher salt
½ tsp fresh-ground black pepper


Heat a non-stick skillet with about 2 tsp olive oil until very hot. 

Add corn and cook until golden brown here and there.  You don’t want to caramelize all of the corn, you’re just getting a little smoky flavor.  The kernels will start to jump and pop when almost done. Scoop corn into a medium bowl and allow to cool a little.  While cooling, add all the spices to the corn, the chili powder through black pepper. 

Once some of the heat has dissipated, fold in the rest of the veges and lime juice.  Taste for seasoning.  If you’re going to serve this cold, you may need to add a little more of the spices because the cold kills flavor.  Put in the fridge for a few hours for flavors to meld and enjoy.  If you wanted to make this a salsa instead, I would add some chopped cilantro, maybe another jalapeno and dice all the veges smaller.


The Baconing: Part 2


When we last left our fearless leader we were just finishing up the curing of the pork bellies.  As a short recap the bellies were about 15 lbs total and were cured in a basic cure (recipe here) for seven days.  At the end of the curing time your meat should have stiffened up considerably.  The next thing you’ll need to do is rinse off the excess salt and pat the bellies dry.  Once dry you’ll need to be patient while the bellies rest for at least overnight.  If you’re going to be smoking your bacon, which is tradition, you can not skip this step.  If you don’t smoke the bellies you’ll have something more akin to Italian pancetta rather than bacon, still tasty but not quite the same thing.  If you’re sans smoker you can roast the bellies until they reach an internal temperature of about 145ºF.  Let them rest a smidge and if they still have their skin this is the perfect time to slice it off.  But since we’re making traditional ‘merican bacon we’ll get back to the resting.  
What’s happening at this point is that a pellicle is forming.  No, I didn’t say pelican, I said pellicle.  One’s a marine bird and the other makes bacon tasty tasty, there may be a connection there but it eludes me at this time.  What, you ask, is a pellicle?!  During the curing proteins are extracted from the meat and when rested overnight they get a little bit tacky.  Not as in a pink flamingo themed mobile home tacky, more like sticky/tacky.  The pellicle is what the smoke adheres to (note the previous mention of tasty tasty).  You’ve got a few options during this phase of the baconing process but in essence you want there to be sufficient air flow around the belly for pellicle formation.  Option 1 could be either putting the belly uncovered on a cooling rack over a jelly roll pan and Option 2 is hanging the belly by either a hook or loop of butcher’s twine.  Both options need to be refrigerated.  I’m a big fan of the bacon hangers available over at Butcher Packer: (Bacon Hanger).  They’re inexpensive and look awesome manly!  
Here’s a photo of the bacon resting happily in the fridge:  

Ok, so now we’ve cured, rinsed and rested our bellies and it’s time to smoke ‘em!  Now, as with a lot of projects there are a few little steps between the bigger steps which elevate a product from, “Ya know, this doesn’t taste so bad.”  to  “Holy shit Mable, this is the best meat I’ve ever stuffed into my pie hole!!!”  This one goes back to your middle-school science classes where you talked about condensation and this step is all about eliminating that.  Remember, you worked hard to get that pelican, errr...pellicle, to form and gosh darn-in you want that smoke to stick!  So what you do here is bring the meat out of the fridge, hang it in your smoker, direct a fan on the bellies and let them swing in the wind for about an hour.  The breeze will help evaporate any condensation from the bellies as they come up to ambient temperature.  The use of the fan is the best option when cold smoking, however, if you’re using a hot smoker you can put the bellies in a pre-heated smoker at it’s lowest temp and let them hang for about an hour to warm up and re-dry before adding smoke.

Here's a picture of my meat swingin' in the breeze.  The bacon's in the back and that's tasso up front (more on that in another post):

The current popular favorite smoke flavor for bacon these days applewood, but I find apple to be a fairly light flavored smoke so mixed my chips with hickory for a 50/50 blend.  I’m a huge fan of hickory and was super excited to find inexpensive bags locally for under $3.  SCORE!  About 30 minutes into the temperature equalization I started my coals which will be the heat source for the smoldering chips.  I have a decidedly old-school hillbilly-esque smoker.  You can spend hundreds on a smoker, I spent about $25 which means more money for meat.  My smoker is set up right now for cold smoking as the smoke source (read: Heat) is isolated from the products to be smoked by a 6’ run.  This means that my smoker runs just a couple degrees about ambient temperature.  


So the coals came up to temp in the chimney starter and just about the same time the bellies were ready to get smokin‘ so I closed the door and dropped a handful of my apple/hickory blend onto the coals and went to get a beer.  This part of the smoking process is second only to the meat as you gotta just hang-out and let the smoke do it’s work.  You’ll have to learn the traits of your smoking device but mine needs to be fed fresh chips about every 30-40 minutes and fresh coals at about the 6 hour mark.  This meant I was going until about 7 pm but is the price I pay for greatness!  

Don't you just wish you had smell-a-vision?!?!?

Before:


After:


After all the curing, drying and smoking more patience is sadly needed because foods fresh off smoke tend to taste harsh and overly smoked and generally like to rest in the fridge for about 2-3 days.  That said, I encourage daily taste-tests daily to check on the progress of your bacon. 


Tasting notes:   My thoughts were that the bacon was a tad salty so I’m going to cut my cure time from seven to six days on the next batch and because I love hickory so much I’m going to move to a more dominate hickory flavor and move my blend to about 60-70% hickory. 


Monday, July 9, 2012

Compliments?!?!

So I was leaving work this afternoon and a co-worker tells me I'm the only person he knows who can sling their meat for money and isn't in porn.

You just can't beat my meat!

Sunday, July 8, 2012

The Baconing: Part 1


After trying my hand a fresh sausages and some cured beef products (namely corned beef and pastrami I'm finally headed over to porkville to try my hand at cured and smoked pork happiness.  A week or so ago ago a got my hands on a 10 lb duroc belly from Salmon Creek Farms and a 10 lb belly Asian cut belly.  The Asian cut is new to me but it turns out it's a pretty cool product.  The Asian cut includes the meat from between the ribs so it makes for a thicker belly.  The Asian cut belly is actually quite a bit thicker than the duroc if you take a look at the picture below.  The Asian cut belly is the upper belly in the picture and fit almost perfectly in the half-sheet pan which makes it about 18 x 13 inches.  The duroc is on the bottom and as you can see it’s a bit thinner, not a wide but quite a bit longer.      


Here’s a picture of the duroc belly halved.  I decided to cut them to make the overall handling of the bellies a bit more manageable.  
The first thing to do is to mix your basic cure.  I highly recommend using a scale to weigh your ingredients as it’s a much more accurate method.  I also like to do a lot of my recipes in metric as it makes adjustments a little easier.

450 grams kosher salt (not iodized table salt)
225 grams sugar 
50 grams Cure #1

Mix everything together, can be stored indefinitely.  

If you’re new to the idea of curing meats I’ll take a moment to talk about Cure #1.  Meat products that will be spending any appreciable time out of refrigeration need to have some protection against nasty microbes and in the case of charcuterie products sodium nitrite is the way to go.  Cure #1 is a mix of 93.75% regular salt, 6.25% sodium nitrite and a smidge of red food coloring to turn it pink so you don’t mistake it for sugar or salt.  It's most often referred to as 'pink salt' as it's mostly salt and tinted pink, go figure!  Sodium nitrite is very strong stuff as the small amount used in the mix is sufficient to cure at least 20 lbs of meat and you wouldn't want to mistake it for something else.  Besides it’s antimicrobial properties sodium nitrite gives cured meat products such as bacon, corned beef, salamis and the like their pink rosy hue.  Without pink salt cured products would look like regular meats, grey and not very visually appealing.  They also add a bit of tang to the flavor...basically Cure #1 is the linchpin for curing.  Cure #1 goes by many names such as Tinted Curing Mix, T.C.M, DC #1, InstaCure #1 but in the US it’s all essentially the same.  The European version has a much lower concentration of sodium nitrite and shouldn't be substituted.  You might find Morton’s Sugar Cure and Morton’s Quick Cure in your area and I personally don’t use them for a couple reasons.  First, it includes both sodium nitrite and sodium nitrate.  The first we want for this application, however, the second is typically used for longer cures and is not necessary.  The second concern is the inclusion of ingredients to keep the mixture “uniform”.  The way I look at it is that I’m making my bacon so that I know exactly what’s going into my food and to use a pre-mix such as Morton’s I’m releasing some of that hard-earned control.  Cure #1 is quite inexpensive and can be purchased from many sources, my preferred place is Butcher-Packer: http://www.butcher-packer.com/index.php?main_page=product_info&cPath=237_12&products_id=55 
Remove the bellies from whatever packaging and if they are wet-packed give them a good rinse and pat dry.  Now take a handful of your basic cure and spread it all over one side of the belly and give everything a good rub.  Repeat the process coating all sides of the belly with your cure solution.  Size permitting I prefer to use restaurant bus tubs for my curing as they’re inexpensive, light and hold a lot of product.  
Here’s a picture of the Asian cut bellies after their massage and rub down:

Now place your bellies in the refrigerator.  Every other day you’ll want to overhaul your bellies which means rotate them top to bottom, upside to downside, so on and so forth and toss them back in the fridge.  Some recipes state to remove any liquid that has accumulated at the bottom, other’s state to add more cure every overhaul.  I decided not to add additional cure mix and leave the liquid.  Because the liquid is a combination of the cure and liquid extracted from the bellies I wanted there to be good contact between the bellies and the liquid.  If you notice in the picture below the liquid doesn't reach the top belly so I diluted the mixture with cold tap water, moved the top belly to another bus tub and added some of the diluted liquid so everyone had the same channce for a dip in da' pool as it were.    
Here are the bellies after a couple days in the cure.  As they continue to cure you’ll notice that they’ll get harder and less pliable.    


I let these bellies cure for seven days, stay tuned for the second half of The Baconing where we get into the smoking and resting then the taste testing! 

Edited: This recipe is based off the one in the book Charcuterie by Ruhlman and Polcyn.  While the dredge method is quick and easy the bacons were very salty and there is too much Cure in the recipe.  I have since revised my methodology in more recent postings.