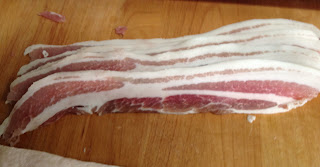
When we last left our fearless leader we were just finishing up the curing of the pork bellies. As a short recap the bellies were about 15 lbs total and were cured in a basic cure (recipe here) for seven days. At the end of the curing time your meat should have stiffened up considerably. The next thing you’ll need to do is rinse off the excess salt and pat the bellies dry. Once dry you’ll need to be patient while the bellies rest for at least overnight. If you’re going to be smoking your bacon, which is tradition, you can not skip this step. If you don’t smoke the bellies you’ll have something more akin to Italian pancetta rather than bacon, still tasty but not quite the same thing. If you’re sans smoker you can roast the bellies until they reach an internal temperature of about 145ºF. Let them rest a smidge and if they still have their skin this is the perfect time to slice it off. But since we’re making traditional ‘merican bacon we’ll get back to the resting.
What’s happening at this point is that a pellicle is forming. No, I didn’t say pelican, I said pellicle. One’s a marine bird and the other makes bacon tasty tasty, there may be a connection there but it eludes me at this time. What, you ask, is a pellicle?! During the curing proteins are extracted from the meat and when rested overnight they get a little bit tacky. Not as in a pink flamingo themed mobile home tacky, more like sticky/tacky. The pellicle is what the smoke adheres to (note the previous mention of tasty tasty). You’ve got a few options during this phase of the baconing process but in essence you want there to be sufficient air flow around the belly for pellicle formation. Option 1 could be either putting the belly uncovered on a cooling rack over a jelly roll pan and Option 2 is hanging the belly by either a hook or loop of butcher’s twine. Both options need to be refrigerated. I’m a big fan of the bacon hangers available over at Butcher Packer: (Bacon Hanger). They’re inexpensive and look awesome manly!
Here’s a photo of the bacon resting happily in the fridge:
Ok, so now we’ve cured, rinsed and rested our bellies and it’s time to smoke ‘em! Now, as with a lot of projects there are a few little steps between the bigger steps which elevate a product from, “Ya know, this doesn’t taste so bad.” to “Holy shit Mable, this is the best meat I’ve ever stuffed into my pie hole!!!” This one goes back to your middle-school science classes where you talked about condensation and this step is all about eliminating that. Remember, you worked hard to get that pelican, errr...pellicle, to form and gosh darn-in you want that smoke to stick! So what you do here is bring the meat out of the fridge, hang it in your smoker, direct a fan on the bellies and let them swing in the wind for about an hour. The breeze will help evaporate any condensation from the bellies as they come up to ambient temperature. The use of the fan is the best option when cold smoking, however, if you’re using a hot smoker you can put the bellies in a pre-heated smoker at it’s lowest temp and let them hang for about an hour to warm up and re-dry before adding smoke.
Here's a picture of my meat swingin' in the breeze. The bacon's in the back and that's tasso up front (more on that in another post):
Here's a picture of my meat swingin' in the breeze. The bacon's in the back and that's tasso up front (more on that in another post):
So the coals came up to temp in the chimney starter and just about the same time the bellies were ready to get smokin‘ so I closed the door and dropped a handful of my apple/hickory blend onto the coals and went to get a beer. This part of the smoking process is second only to the meat as you gotta just hang-out and let the smoke do it’s work. You’ll have to learn the traits of your smoking device but mine needs to be fed fresh chips about every 30-40 minutes and fresh coals at about the 6 hour mark. This meant I was going until about 7 pm but is the price I pay for greatness!
Don't you just wish you had smell-a-vision?!?!?
Before:
After:
After all the curing, drying and smoking more patience is sadly needed because foods fresh off smoke tend to taste harsh and overly smoked and generally like to rest in the fridge for about 2-3 days. That said, I encourage daily taste-tests daily to check on the progress of your bacon.
Tasting notes: My thoughts were that the bacon was a tad salty so I’m going to cut my cure time from seven to six days on the next batch and because I love hickory so much I’m going to move to a more dominate hickory flavor and move my blend to about 60-70% hickory.


0 comments:
Post a Comment