Friday, November 30, 2012

Loukaniko - My Big Fat Greek Sausage

I’ve talked a lot about innovation and experimentation particularly with the Frankenbacon chronicles but in fact there are two ways to experiment.  The first is just to close your eyes and take a leap of blind faith.  Sometimes things will work out, sometimes not so much.  But, there is something to be said about pure experimentation for experimentation’s sake.  The second way is to riff off of an existing standard.  It's completely acceptable to create a personalized version of a known or iconic dish, but, if you do you gotta pay the piper.  First things first, before you know which direction you want to take your personalized idealized version of a foodstuff you need to know what the original was meant to be.  Without that base knowledge you're running blind and might as well just have gone for option one, the blind leap of faith. 

In my quest to find my voice and personality when it comes to charcuterie items I’ve been trying various recipes and on subsequent versions I might tweak something here or there until I get my personalized version.  The latest encased meat to meet it’s maker was Loukaniko, a Greek sausage.  I was directed to this sausage by my boss who is very proud of their Greek heritage (as has been the case with every person of Greek origin I’ve ever met).  I made this as an homage to her and I’m waiting for feedback from her and her mother, aka Ya-Ya.  I poached the recipe from Len Poli’s exceptional compendium of meat-dom and the original can be found here: Loukaniko


I did things as close as I could to the original with what I had available and here’s my version:

Fresh Loukaniko – Greek Sausage
2270 grams pork shoulder
227  grams pork fat back
¼ cup red wine (I used Two-Buck Chuck)
36.0 grams kosher salt
12.0 grams orange zest
4.5 grams minced garlic
2.0 grams ground anise (not fennel)
2.0 grams fresh ground black pepper
2.0 grams dried marjoram
0.6 grams cinnamon
0.5 grams allspice
Hog casing

Grind all meat and fat through the large die of your meat grinder then regrind through your smaller die.  Once ground mix all remaining ingredients until the meat mass becomes tacky.  Stuff and twist into long links, about 6” each. 


According to my boss loukaniko should be grilled until very, very well done...charred actually.  I prefer to poach mine first until I reach an internal temp of about 155ºF then shock in an ice bath.  The sausages are later re-heated and crisped up on the grill.  This two step process allows the emulsion of meat and fat to set up fully so that I the texture doesn't get messed up when I grill it.   


Tasting Notes:  it took me a couple tries to like this sausage but eventually it grew on me.  At first I felt the orange zest was too strong and overpowered the mix.  The next day I tried another link and my first thought was that the sausage reminded me of winter.  Essentially mulled spices in meat mix with the red wine, orange, cinnamon and allspice. While not unpleasant I still wasn’t feeling it.  On day three or four I did my poach/grill job on them and they were fantastic.  The orange had mellowed and the spices melded together and got all happy-like.  I think moving forward I might adjust the flavorings based on the anticipated consumption rate.  If I’m making the sausages to be consumed the next day I might cut things down a hair, however, if I’ve got a few days lead time I might use the basic version as everything will calm down before final preparation.   

Tuesday, November 27, 2012

Frankenbacon - Hippity Hop Bacon

                                            
It should be patently clear by now that I'm a happily irreverent fellow as I'm regularly looking for new ways to do things, new flavor combinations and the like.  Interestingly this final bacon was actually the start of the whole idea of the frankenbacon experiments.  A good friend of mine, Mike S. (@guambrewer on Twitter), is a prolific and phenomenal home brewer and one day while helping him brew we got to talking about where our two hobbies intersect beyond the pie-hole love gravy that occurs when drinking a well-made brewski and eating some nice charcuterie. 

We agreed that the majority of beer-ish recipes are primarily an adaptation of an existing recipe but with beer added.  For instance, beer braised short ribs is just a basic short rib braise with the beer swapped out for the standard stock or wine.  Stout mashed potatoes?  Just a basic mashed tuber with beer added instead of stock or dairy.  Now don't misunderstand me, the majority of these things are tasty well thought out preparations, their only fail-point being a lack of creativity or ingenuity, knockoffs of the original if you will.  That said, there was only one really good outside the box recipe that I can point to and say, "that's something I’d like to make" and that's Hamilton’s hop sausage.     

I went to Hamilton's sister resto/bar, Small Bar, with another friend to try the hop sausage.  First off, I gotta give them props, the sausage was tasty but I was left a little underwhelmed.  The tube-steak reminded me of a Sweet Italian sausage with hops.  While tasty it didn’t seem very innovative.  During my meal I happened to get to talking with the cook who made the sausage and I inquired about the how it was made.  He just shrugged his shoulders and mumbled something about, "they just give me a bag of hops and I just toss it in the sausage mix."  He had no idea of ratio, quantity, etc. 

In respect to the tastiness of Hamilton’s hop sausage I wanted to go one step further and of course, use my preferred medium, pork belly.  As I previously mentioned beer is already added to various recipes with lots of bark but too little bite.  I wanted Bond, James Bond... intrigue, beguile, not Jean Claude Van Dam, all show and no go. So instead of just adding beer to the cure I decided to go with the primary ingredient that makes beer beer which is to say, hops.  I didn't want beer bacon, I wanted bacon that was reminiscent of beer.  As hops is the ingredient that gives beer its bitterness and contributes the majority of flavor components I was shooting to transfer a smidge of the bitterness as well as a the flavor profile of the hops into the bellies.  I also wanted a sweet component often found in bacon but staying within the vein of beer-dom I thought of Belgian Rock Candy which I’d often snack on whilst hanging out at Mike S’s. When I brought this idea up to Mike he recommended I instead use Belgian Candi Syrup, which would give me a similar flavor to the rock candy but coming in liquid form it might be easier to work with so that’s the route I took. 


I had the opportunity to speak to one of the brewers from AleSmith brewery about how best to get the hops flavor into the bellies and dismissed the idea of a dry rub as there would likely not be enough flavor transfer.  He instead recommended a hop tea which I decided to go with and I’ll outline the process below.  I did two Hop Bacons, one with the Belgian Candi sugar and one without. 

Hop Tea Bacon
920 grams pork belly
27.6 grams kosher salt
2.94 grams pink salt
22 grams Willamette hops   

Hop Tea/Belgian Candi Bacon
1254 grams pork belly
37.6 grams kosher salt
4 grans pink salt
22 grams Willamette hops
100 grams Belgian Candi Sugar

As with before the first three ingredients are the basic bacon cure.  For the hop tea I brought 2 cups of water to 200ºF, added the hops and allowed the hops to steep for 15 min.  I then strained the liquid, pressed on the solids to get as much liquid out as I could then returned the tea to the pot and reduced the tea from 1.25 cup to ½ cup. 

When I made the second bacon I only ended up with ¾ cup of hop tea and reduced it down to ½ cup.  I whisked the tea into the Candi sugar.

They’re the two on the right with the Belgian being the furthest to the right.   


Both bacons were allowed to cure then were rinsed and smoked just like the other Frankenbacons. 

Tasting Notes:  Again, not so much impressed.  As the bacon was edible I won’t call it a complete failure but I didn’t get the hops flavor I was hoping for.  Considering the cost of hops and the Belgian Candi Sugar ($10 for the jar in the picture) the cost-benefit analysis just didn’t work out in the bacon’s favor.  I’ll probably do more experiments in the future and I like the dark color achieved by using the Belgian Candi Sugar but I think I’ll call this one a dead end and think a little more about what direction to move. 

Saturday, November 24, 2012

Frankenbacon - Mi Amigo el Mexi-Bacon

So here we are on the home-stretch as we explore the insanity of Frankenbacons. Most appropriately stated by the great thespian Ozzy, "I'm going off the rails on a crazy train," Similar to the last post I won't be putting in too much background as it's already been discussed ad nauseum here, here and here. And this brings us to #3 on the list of experiments, Mi Amigo el Mexi-Bacon. This second to last bacon installment kinda straddles the line between the Bulgogi Bacon and the Dilly Bacon and caused me both a bit of grief and anguish. Similar to the Dilly there just wasn't a lot of flavor present but like the Bulgogi, there should have been a lot more there. To be honest, I had high hopes and they were dashed like a fart in the wind.

Below is the base recipe and while other posts didn't seem to need a lot of methodology discussion I feel that this one needs at least a bit, primarily for the lessons it taught, but mostly what to do different next time. With no further ado, here we goooooo.....

Mexi-Bacon
710 grams pork belly
21.3 grams kosher salt
2.4 grams pink salt
1 ancho chile (see methodology below)
3 molino chiles (see methodology below)
1/3 cup piloncillo (unrefined mexican cane sugar)


The first three ingredients are a basic bacon cure while the rest is the Mexi part of the equation. Typically when working with dried chiles the standard way to prep them is to remove the stem, open up the chile and remove the seeds then toast the chile in a dry skillet (preferably cast iron) over medium heat until they become fragrant, soften and blister slightly. You want a light toast, not char. Also, because chiles are an imperfectly shaped product you'll likely need to press them down onto said dry skillet with a spatula. Alternatively I've heard of some people toasting chiles over an open gas flame while holding the chile with tongs.
Now the piloncillo, that's one tough mother to crack, literally. It's unrefined cane sugar that's poured into a cone-shaped mold and allowed to solidify. And when I mean solidify I mean solid like a rock. In the last when my piloncillos were not as fresh I had to resort to either a hammer or the spine of a heavy chefs knife to break the cone into chunks. Sadly I'm not joking so be careful here folks. Thankfully the cone I purchased for this run was super fresh and I was able to shave off slices like a big ol’ bar-o-chocolate. I followed the standard use of piloncillo which is to say melted, I put the sugar in a saucepan over very low heat and melted the sugar into a liquid.

So now what we have are some toasted chiles and Mexican napalm, I mean sugar. The idea was that I'd rub the belly down with the salt and cure, paint on the sugar and sprinkle with chopped chiles. However, I will now share with you the first fart in the wind. I prepped the sugar while I was working on the chiles, but because I didn't want to overcook the sugar into burnt caramel I pulled it off the heat as soon as it was happily melted. However, once I got around to using the sugar it had cooled back into a near solid block. So....back onto the heat it went, but carefully and just until it melted (again).

Now back to a semi-melted sugar I pour it onto the (cold) pork belly and the first thing that happens is that I'm back to hard as a rock, or at least that's what I thought. In my haste to save the day I attempted to smear the hard sugar over the belly and found out that it. Was. Not. Solid. Or even cool for that matter. I refer you to my prior reference to Mexican Napalm. The words that spewed forth from my pie hole would have made a sailor blush and the end result was chunks of solidified sugar encrusting my fingers and leaving a sad patchwork of sugar on the belly. To add insult to injury I decided to attempt to rub the now shredded chiles on the belly leaving me pretty much tarred and feathered which would be fart in the wind numero dos. Not so much pleasant. But hey, I now had the beginning of some presumably, hopefully, maybe awesome bacon. So the bacon was allowed to cure in all its ugliness and when done it was rinsed, hung and smoked per the other frankenbacons.  On the middle belly in the picture below note the patchwork coloration achieved by imperfect application of chile making the bacon look like one of Cruella DeVille’s precious’. And believe you me the looks did not improve one little bit with smoking, not even a little.


So tasting notes.... Meh...boring. Not much there but still had the funk of the other frankenbacons which I've previously attributed to the hops in the smoke production. So what needs to change? Quite a bit to be honest, my failures are opportunities for improvement and this is how I'm planning to proceed....

  1. No napalm - instead I'll find a way to grate the piloncillo so it can be applied more like standard sugar
  2. Pulverize the chiles into a powder
  3. Enhanced flavorings and I'm leaning towards cumin (one of my personal favorite spices) and/or cinnamon Stay tuned for the final installment of Frankenbacon-dom, Hopped Bacon.

Friday, November 23, 2012

How to Tie a Salami

I copped this video from one of the charcuterie sights I follow http://curedmeats.blogspot.com.  Great video showing some really impresive skills from someone who knows how to do it right.  One day I hope to be half this good.

Tuesday, November 13, 2012

Frankenbacon - Bumfuzzled Bulgogi Bacon


This is part three of a five part series where I look into how far I can push the boundaries of what can be defined as bacon.  If you need a refresher here is the original post Frankenbacon and here is Part II, Dilly Bacon.

This post is going to be about one of the more successful experiments which if you read the title was the bulgogi bacon.  I've been kinda stumped about how to describe bulgogi to someone who hasn't had the pleasure of this awesome Korean dish orgy of flavor.  In its more traditional form bulgogi is thinly sliced beef that can only be described as an explosion of flavor in your bacon-receptacle.  Bulgogi falls solidly within the standard Asian in flavor profile by it's inclusion of soy, garlic, ginger and scallion (or as my Asian cuisines instructor called it, GGS) but differs from your stereotypical marinades a couple ways.  Teriyaki, which we can agree is the most approachable, bastardized and well known Asian marinade, is dominated by brighter and cleaner Japanese flavors but is often heavy with soy sauce, sugar and often garlic.  Many Chinese marinades tend towards complexity and often include a flavor base of salty, savory and umami with ingredients such as soy sauce, oyster sauce and chiles.

I feel that  Korean cuisine often straddles the schism between Japanese and Chinese cuisine and takes the best from both worlds.  You get the soy and garlic but also the chilies and often toasted sesame for complexity.  And heck, if you look at a map it makes total sense that Korean food is a little east (china) and a little west (Japan).


When I talk about bulgogi to local SoCal people I refer to it as 'Korean carne asada' and they get it, basically really flavorful moisty meaty deliciousnicity.  If you're outside of SoCal and don't understand the connection then get on the next flight to 'Dago, order up a carne asada burrito at the first taco stand you see and all will become clear.

Korean cuisine is experiencing a bit of resurgence recently with the popularity of the Kogi Truck which just about started the whole mobile cuisine craze as well as Seoul Sausage which is just awesome incarnate.  My original idea was a kimchee bacon but I was a little wary, besides, when I went to my local Korean market this is the selection I had to choose from.  
 

Frankly it was overwhelming.  I decided to go a different route and when looking at the combination of bulgogi and bacon I saw a lot of applications where people took bacon and marinated it to become bulgogi but I didn't see anyone going in from scratch and I felt I found my niche.  

The base recipe was from my days in cooking school when we "explored" the Cuisines of Asia and as mentioned before is great with beef but might be a little overpowering to lighter meats such as chicken or fish.  Obviously pork is a thumbs up!  The marinade was halved for this application and officially starts after the first three ingredients which is actually my base bacon recipe:

Bulgogi Bacon

792 grams pork belly
20 grams kosher salt (I cut this down from my normal 3% to compensate for the soy sauce)
2.5 grams pink salt
1 Tbl toasted sesame oil*
1 Tbl chopped garlic
3 Tbl sliced ginger
1/2 cup sliced green onion
1/2 cup soy sauce (I used low sodium)
1/4 cup sake (I used gin)
1 Tbl vegetable or other neutral flavored oil
1 Tbl sugar
1 Tbl Korean red pepper powder*

*available at most Asian grocers.  If you take the time to seek out a Korean market this is your selection of pepper powder:


The recipe was pretty simple really, I just mixed together all the cure/marinade ingredients, rubbed the belly down and tossed it in the refrigerator.  As per normal curing the belly was flipped daily.

The bulgogi bacon is on the far left of this family portrait. 


More information regarding the curing/smoking process was documented on the Dilly Bacon post.

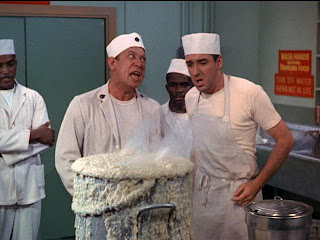
Tasting Notes - this one didn't get knocked out of the park but there was definitely a glint of something worth pursuing.  The bacon did have the pig funk I mentioned in my prior post which I'm attributing to the smoking process, however, this bacon actually tasted like bulgogi!  It made me want to scream, "Shazam!" like Gomer Pyle (who as you tell by the picture below had his own cooking challenges).


Now back to our regular bacon-based programming:  The flavor was muted but was persistent unlike the Dilly where you only got a hint of flavor here and there.  The goal now will be to find a way to bump the flavors up.  I'm not sure if increasing the quantity of marinade so that more is in contact with the pork bely will get me where I want to go with the flavors but it's worth a shot.  One concern I have is that there was a lot more expense involved with this recipe when compared to a more basic bacon cure and this belly was only about 1.75 lbs.  My typical pork belly is in the 8-9 lb range and this might get expensive real quick. The next step might instead be trying to isolate the flavors and move forward with those ingredients that provide the flavor bombs and drop off the ones that got lost in the shuffle.  For instance, I might increase the soy sauce and sesame oil by 50% and at the same time eliminate the sesame seeds (which were a bastard to wash off the bellies so good riddance).  I'm a little on the fence regarding the sake/gin.  Alcohol enhances flavor by making alcohol soluble isoflavones available for your flavor receptacles (aka - your tasty buds) but there's so little in this recipe that if I choose to keep it I'll likely swap it out for something more cost effective such as vodka if not eliminated entirely.  More to come down the road on this one. 

Then again, I might just use v2.0 as an excuse to buy this:


Monday, November 12, 2012

Frankenbacon - The Dilly Diaries


I've always felt like my life has been all about walking a fine line. My wife would tell you that I hate change, that the status quo is my BFF, I've learned it's just safer not to argue with my wife for two reasons: a) it's generally unsafe and b) she's normally pretty spot on.  Admittedly, I like things that might be considered "classics" as well as things that are paradigms of order and codification such as Escoffier and german engineering.  I'm not really sure how I came to love ABBA though, gonna have to take a mulligan on that one.  So while one side of my brain strives for order the ADD side of things is just chaos and wonders how far it can push things.  How this normally manifests itself is that I follow a recipe once with as little deviation as possible, then once I have a basic understanding of the steps and flavor profile I can riff wherever I want.  

Charcuterie follows a similar path, there is a lot if order and pigeonholing of techniques but my mind got to thinking, "How far can I push something and still consider it and extension of the original?  At what point do I stretch so far from home-base that I hit a home run, or more likely, foul one into the stands, all the while swinging as if my life depended in that one last at bat?"  And I figured what better canvas than bacon!! 

I feel that I've gotten pretty solid with makin' bacon.  I've cured, smoked and sliced somewhere in the range of 24 full hog bellies.  I know that this is the equivalent of 2 minutes of operation at the Swift plant but for little ol' me, that's a lot of pig.  I've even stretched my wings a smidge and made some honey cured bacon coated with chile and black pepper that has been very well received.  But now I was ready to step up to home-base again, swing for the fences and see if I hit a home run or whiff.  

As it turns out, I did a little of both.  More importantly though, I learned some things which I hope to apply moving forward.  If you've been following my musings you might have already seen the start if this experiment.  If not or if you need a refresher you can read the short post here: Frankenbacon

As a quick recap I was trying out five new bacon cures to see how things might shake out.  All used Berkshire pork bellies from Eden Farms, 3% kosher salt based on the weight of the chunk of pork belly and 0.3% pink salt also based on the weight of the pork belly.  I also did another experiment on all five bacons which was during the smoking process and I'll get into that in a bit.  Today's post will be about the Dilly bacon and the rest will come through the week.  When I solicited suggestions on potential flavors to try a friend of mine, Graham, recommended dill pickle and this was my first attempt. 

Dilly's in the middle:


Dilly Bacon

762 grams pork belly
22.9 grams kosher salt (3%)
2.4 g pink salt (0.3 %)
2.5 grams coriander seeds, toasted and ground
6.5 grams dill seed
5 grams dried dill 
22 grams fresh garlic, sliced

All the dry stuff was mixed together and rubbed all over the belly, from sea to shining sea.  I let the belly cure in the fridge for seven days and flipped it daily.  After curing I rinsed the belly and let it sit overnight before applying smoke.  The belly was smoked for about 7 hrs then left to rest for a day before slicing, cooking and consuming.

First thoughts when putting the cure together was that the coriander was smelling awfully strong and I was concerned that it was going to overpower the cure.  I also wanted to get something acidic into the cure to get more pickle-like but was concerned about the effects of the acid on the raw meat during the long cure and thought I might end up with a dill flavored pork belly ceviche which sounds wrong on so many levels.  I little sleuthing around the inter-webs showed me an intriguing dehydrated vinegar but had neither the time nor inclination to try it on this evolution.   

Tasting Notes - In a word, "meh" with a solid shoulder shrug.  Boring with no heavy dill flavor infestation. I got a very mild hint of dill here and there but overall I was unimpressed.  That said, it was the favorite of my friends.   There was one other dimension to the flavor that I attribute to the smoking process as I tasted it across all five flavors and it can best be described as a pig funk, but in a kinda good way.  It's that funk you taste on cured pork products that have been aged for a really long time with just salt.  While not altogether unpleasant it definitely felt out of place and I didn't like it.  Regarding the Dilly overall, I'm not feeling drawn to go forward with a second evolution.  I just don't feel I had any solid flavor integration successes to step forward from.  As someone wise recently told me, "You gotta kiss a lotta frogs before you find the prince!"  This was definitely a frog. 


As I noted in my original Frankenbacon post I wanted to incorporate hops during smoking and even went so far as so do a test burn with full hops and pellets.  The full hops burned well during the test but I had concerns regarding how fast they might burn and the space they would take up in my a-maze-n smoker so switched to hop pellets.  I scored 1 oz of liberty and 1/2 oz of Saaz hops pellets from my buddy Mike and dispersed them throughout my mix of oak pellets, lit the smoker and walked away.  After smoking was completed I noticed residual oils in the a-maze-n smoker and a slight undercurrent of burning vegetal smell but not much else.  Also, I learned that hops is very closely related to marijuana and wondered what my neighbors must have been thinking after smelling my smoker going for 11 hours straight.  Thankfully I didn't have my door busted down by the DEA so all is good.  Oddly enough I went through a bag of Cheetos waiting for the bellies to finish smoking.   I don't know if the bacon funk was because the pellets were on the older side of things but they had been properly stored.  It was a fun experiment but not one I plan on repeating anytime soon.   

Sunday, November 11, 2012

Jewish Haute-Charcuterie: Pastrami


There are few foods that elicit such a visceral response in humans such as the emotions that flow from the consumption of meats, particularly those that have been kissed by the winged angels of curing and smoking.  The refinement of a well produced meaty treat forces us to walk a fine line between gentile pinky in the air tea drinking haughtiness and Neanderthal-like tendencies to smear food on our bodies and writhe in the meaty goodness that is the trifecta of meat, spices and smoke.  I recently invited a number of friends over to partake in the creation of some encased meat products and to feed these huddles masses I begged my wife to allow me to make a pastrami.  After many promises (and more begging) she conceded.  To be perfectly honest I think she was just tired of hearing me whine, "But it's just a little meat... Pleeeeeeeese????  With sugar on top?????"   Yeah, in hindsight it was definitely the begging like a fat kid who just saw a Snickers in the grocery checkout aisle.  (Don't hate, that was actually me last week)

So with approval in hand I skipped on over to my local Costco Business to procure some meat o' the gods.  These days pastrami is made from the brisket which is the major muscle between the cow's front legs and up a little towards the animal's chest.  Because the muscle is directly used for support and mobility for such a large creature the muscle is at the same time very flavorful from all the use but tough as nails and needs a looooong and sloooow cooking to bring out the best in flavor and texture. The brisket can be purchased split into its two primary muscles; the 'point' cut and the 'flat' cut or both still attached together.  When together the point overlaps about half of the flat and over the front, kinda like a meat version of a Salvador Dali melting clock....but tastier.  People who prefer the point cut like it because it tends to have a greater amount of marbling (read: intramuscular fat) and fat = flavor-town.  However, the point cut is oddly shaped, the grains run a funky direction making slicing more of a challenge and for some people it's just too fatty.  The point is like the Ying to the flat's Yang.  The flat cut tends towards a fairly consistent square shape, has a more predictable grain for easier slicing and is leaner.  In today's America where fat = the Devil the flat cut is marketed as the superior choice due on large part to its lower fat content (however still not low-fat).  


While we currently recognize brisket as the king of both pastrami and its kissing-cousin, corned beef, it was originally made with a cut called the Navel and was the Jewish answer to pork-based charcuterie.  Now as far as the Navel is concerned I'm assuming that the reference is to the animal's belly-button ( do cows have belly buttons? While I'm pretty sure, anatomically speaking, they must but I'm not going to ask to see it) and not some bovine version of the navy.  From a posting over at one of the blogs I follow, http://frombellytobacon.com, beef navel is the cow version of pork belly and has a higher percentage of fat to lean even when compared to the brisket point cut.  I'll seek it out down the road but I had neither the time nor available fundage to go from sea to shining sea for some steak on the hoof, brisket would fit the bill fine for me this time around thank you very much. 


Now back to the selection process.  There are a couple criteria I use when purchasing a brisket, first of all I'd like to avoid purchasing a bunch of fat that I'm just going to trim off.  While I can normally find a use for trim I don't want to pay for something that's just going to be cut off.  Second, and it also relates back to fat content, I like fatty tasty animal flesh as much as the next fat cook but I'm going to be adding quite a lot of flavor through other processes and would prefer a leaner brisket and this is how to select one.  First, gently poke your brisket choices all over and feel how hard and thick feeling your meat is (ewwww, get your mind out of the gutter mister!   What kind if blog do you think this is?). What your actually feeling for is the amount of exterior fat in the brisket, a great deal of which we previously discussed would be trimmed off.  The softer the meat the less fat that will ultimately be trimmed off.  Fat solidifies at a higher temperature than lean meat so the harder the brisket higher the fat content.  Similar to the poke test pick up the brisket and see how flaccid, err....I mean floppy it is.   Once again, the harder and more solid the meat = more fat.   So if you want lots of fat get a brisket that's hard on the outside and pretty solid when its picked up.  I on the other hand prefer a leaner brisket so picked a 12 lb hunk of soft and flaccid meat.  


Here we see the brisket in all its glory.  Also note the fat cap above the USDA Choice sticker.


This next picture is the trimmed brisket, the plate cut is on the bottom, the point is on the top right kinda flopped onto itself and the trim is in the left.


The base recipe is from Charcuterie and called for a 5 lb brisket but since I ended up with about 10 lbs of brisket I doubled the recipe.   Even though you might look at your brine and think its enough you should make the appropriate amount of brine for your brisket to allow for the proper amounts of salt and cure for both flavor and protection from nasties.  


As I've mentioned on the past I highly encourage the use of a scale to weigh your ingredients rather than measure by volume as it's much more accurate.  Also, if you prefer not to make your own pickling spice you can purchase a pre-made blend at your local grocers and it'll be fine.


Brine

3 quarts water 
350 grams (1.5 cups) kosher salt
225 grams (1 cup) sugar
42 grams (8 tsp) pink salt / cure #1 
8 grams (1Tbl) pickling spice (recipe below)
90 grams (1/2 cup packed) dark brown sugar
1/4 cup honey 
5 cloves garlic, crushed 
1 lb ice (yes, weigh it)

5 lb brisket, your preferred cut, fat trimmed to approx 1/4" thickness 

8 grams (1 Tbl) coriander seeds
10 grams (1 Tbl) black peppercorns
1.5 tsp mustard seeds
1.5 tsp smoked paprika (aka Spanish pimenton)
1 Tbl garlic powder 

Pickling Spice

20 grams (2Tbl) black peppercorns 
20 grams (2 Tbl) mustard seeds
20 grams (2 Tbl) coriander seeds
12 grams (2 Tbl) chile flakes
14 grams (2 Tbl) allspice berries
8 grams (1 Tbl) ground mace
2 cinnamon sticks, broken into pieces
8 grams (1 Tbl) ground ginger
10 grams (2 Tbl) juniper berries
6 grams (1 Tbl) star anise
6 grams (1 Tbl) cardamom pods

Here are the pickling spices all happy-like:


For the pickling spice: Toast the peppercorns, coriander seeds and mustard seeds until they become fragrant then crack either with a mortar and pestle, the side of a chefs knife or bottom of a heavy pot or pan.  Don't grind things up fine, you want it to be on the chunky side.  Reserve additional for other recipes such as corned beef and pickles. 

For the Brine: Combine the water through garlic cloves in a large pot of water and heat, stirring occasionally until the sugars and salts have dissolved.  You shouldn't have to get it all the way to a boil but it's not a problem if you do, just don't reduce the liquid.  Once dissolved remove the liquid (now referred to as a brine) and stir in the ice.  The ice is not a requirement; it's there to speed the brine-making process along by quickly chilling your brine.  If you don't want to use it and have the time you can just start with a full gallon of water.  Either way you'll need to get the brine down to less than 40 degrees F before adding the meat.  


Put the meat into the now cooled brine and weigh it down with a plate to keep it submerged and put the whole shebang into a fridge for safe keeping.  


Every day turn the meat over and brine for a total of 6-7 days.  When done brining pull the meat from the liquid, give it a good rinse, pat it dry with some paper towels and put it back into the refrigerator preferably elevated on something like a cookie sheet to rest overnight.  During this time the proteins that have been drawn to the surface by the brine will dry and become tacky.  This tacky coating is called a pellicle and is what the spices (and assuming you're going for the full enchilada) and smoke will adhere to tomorrow.  


Now comes the fun part, pull the brisket out of the fridge, set it on the counter and direct a fan on it for an hour.  This will bring it up to ambient temperature and keep condensation at bay.  While the temperature is equalizing on the brisket get the spice coating going.  Lightly toast the peppercorns, mustard seeds and coriander until fragarant and grind to a powder then mix with the paprika and garlic powder.  After your hour is up, coat the brisket well with your spices and smoke to your heart's content.  I went for about 8 hrs but you might want to start light, say 4-5 hrs.  At this time you can officially call it pastrami.


Close-up of the pastrami rub:


Pastrami rubbed-down and headed to the smoker:


If you have the luxury of a hot smoker you want to get the pastrami up to 160 degrees F.  I, however, do not so after I was done cold-smoking I put the meat on a sheet tray, covered it with foil and plopped it in a very low oven and slooooowly brought it to 155 (don't worry, the residual heat in the meat will get it to 160).  You're going to want to taste it at this point and revel in your awesomeness, however, for optimum slicing compliance chill overnight before slicing super thin across the grain of the meat thusly:   


I like to serve mine on rye or russian bread topped with Swiss cheese, sauerkraut and mustard which I have conveniently included a photo of below for you to drool over.  If you're feeling puckish check out my recipes for Hard Cider Whole-Grain Mustard and homemade Sauerkraut (believe you me, totally worth the effort).


Tasting notes: I'm going to cut my smoke time down to the aforementioned 4-5 hrs.  The smoke level was very well received but personally I found it a little on the heavy side.  Also, I'm going to jettison the mustard seeds, paprika and garlic powder from the coating.  While they're not uncommon I found that the coating tasted a little on the sweet side and want the harshness from the pepper to shine a little more.  Similarly I'm considering reducing the honey and brown sugar levels in the brine to about half the recommended amount.